How do I get started with a new event?
From the initial Events list page, click the 'Create New Event' button. A blank 'Event Info' page will be generated, requesting the most basic required event info. For quickest results start by selecting an Event Manager, then fill in these fields: Event Name, Date, Time, and your Guest Limit. Then click 'Save '. Your event is ready to go and you can start inviting people.
At this point all the other event input fields and options will appear. You can fill in as many of these additional fields as you wish but they are all optional.
How do I create a web page for my event?
When you create a new event, SeatRobot automatically creates two web pages for you: an event ticket page (in case you want to sell tickets) and registration page (where anyone can go and register for your event for free). Having two separate pages lets you promote which page you wish: if your event is free to join, you do not have to create a “$0” ticket for your ticket page and can promote only the Registration page. Even if you are selling paid tickets for your event, you may wish to send certain individuals to a free Registration page for comps, or for signing up guests yourself without them having to pay.
Note: The automatic Ticket page is only available if you have set up Seatrobot Ticketing, including linking Seatrobot's payment processor to your bank account. If Ticketing is not set up in your account, click here to contact us.
SeatRobot creates the pages using the information and images you have entered during event setup - it automatically places your event name, date and venue onto the pages, and puts your event image at the header.
Links to these pages appear on your Event Setup page.
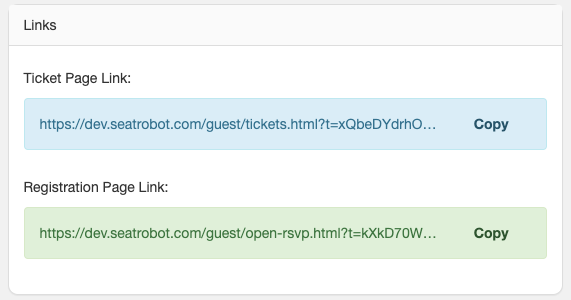
Copy the URL's for either page and add them to your company website, facebook page, Twitter feed, or include them in your SeatRobot invite emails.
How can I let people know about my event?
To let contacts from your database know about your event, invite them (either individually or via contact lists) by creating an Invite on the 'Emails' page. When you invite people from SeatRobot, they receive an invite email with an 'Accept / Decline' button and their own personalized RSVP page. When they accept your invite they automatically show up as confirmed in your Guest List.
If you want your contacts to be able to promote your event to other people you don't know, use the Ticket Page (for paid events) or Registration Page URL's. Copy the URL's from your Event Setup > Event Info page and include them in emails, on your website, Facebook page etc.
Some details of my event have changed. What should I do?
You can update any of the Event Info you entered during Event Setup at any time. Click on Event Setup > Event Info and simply change the information in the fields you previously entered.
Doing this will automatically update the info as it appears on all guest RSVP pages, Registration and Ticketing web pages for your event. If you used Event Macros in your Invites and 3rd Party Invites and Confirmations, the info you changed will also automatically update in all emails sent out from the event from this point onwards.
If you have a change you want to proactively notify your guests about, you can send a Custom Email.